Set up your business
Create your account, show LoopyAI your business, and get everything ready for your first campaign.
This page takes you from nothing to a business that's ready to run campaigns. It takes about ten minutes, plus whatever time you need to find your PAN and bank details.
There are three parts:
- Create your account (a few minutes).
- Create your business: LoopyAI reads your website and fills in your details for you.
- Work through the setup checklist on your dashboard: verify your business, add your address, connect a channel and invite your team.
Before you start
You need:
- A mobile number or an email address you can get a code on right now. You'll be asked for the other one too before you finish, so have both. Mobile numbers can be Indian (+91) or US (+1).
- Your business's website, or any public page about it: a Google Business profile, an Instagram page or a Justdial listing all work. If you don't have one, that's fine.
- A logo image (PNG, JPG, WebP or GIF, up to 5 MB). If LoopyAI finds your logo on your website, you won't need to upload one.
To run campaigns you'll also need your PAN and your bank account details later. See Get verified.
Create your account
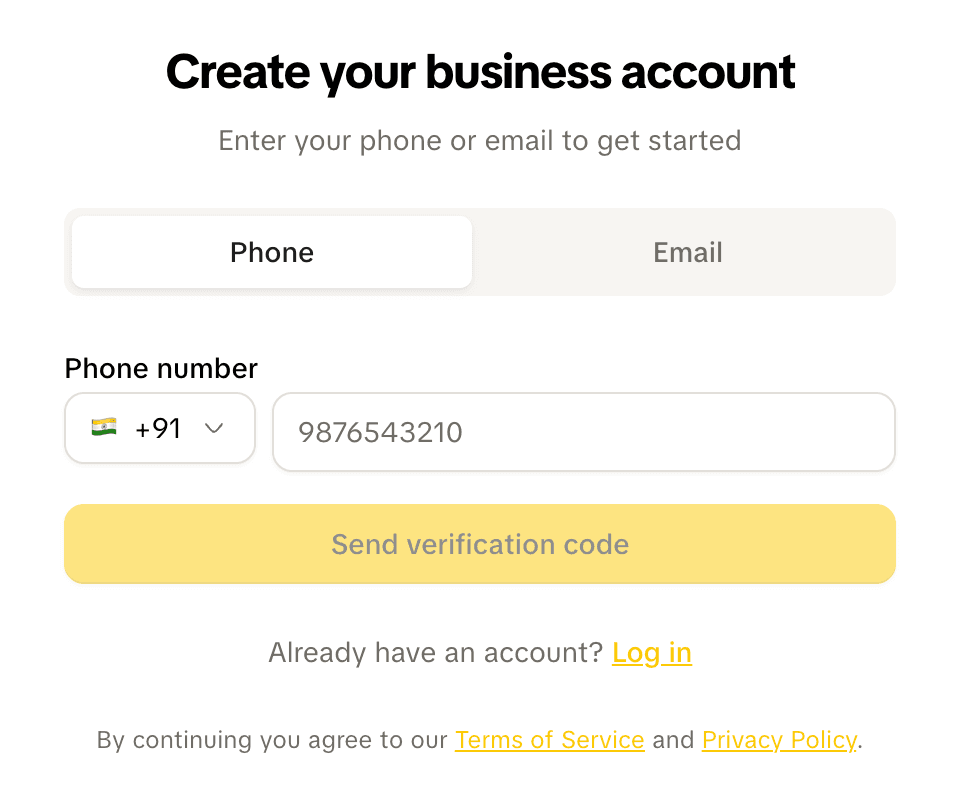
- Go to the Loopearn business site and click Log in, then click Create account under the box ("New to Loopearn? Create account"). The heading changes to "Create your business account".
- Pick Phone or Email.
- Phone: pick +91 or +1, then type your 10-digit number.
- Email: type your email address.
- Click Send verification code. It stays greyed out until the number has 10 digits or the email box isn't empty.
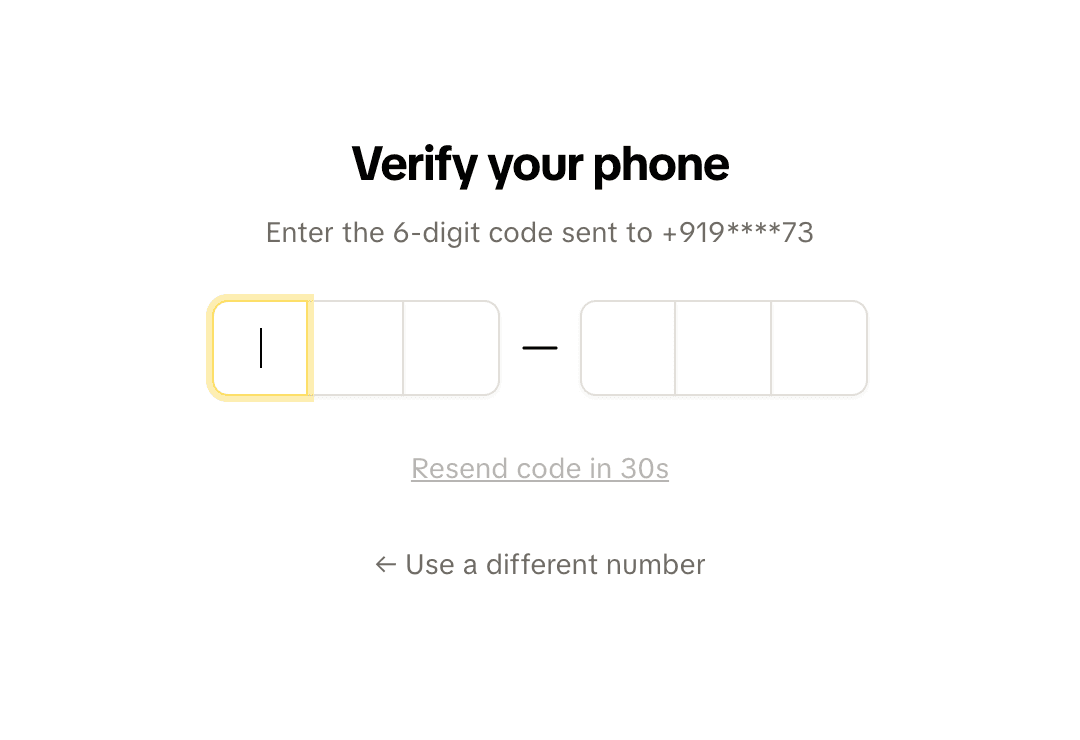
- Type the 6-digit code you were sent. It checks itself as soon as you type the sixth digit.
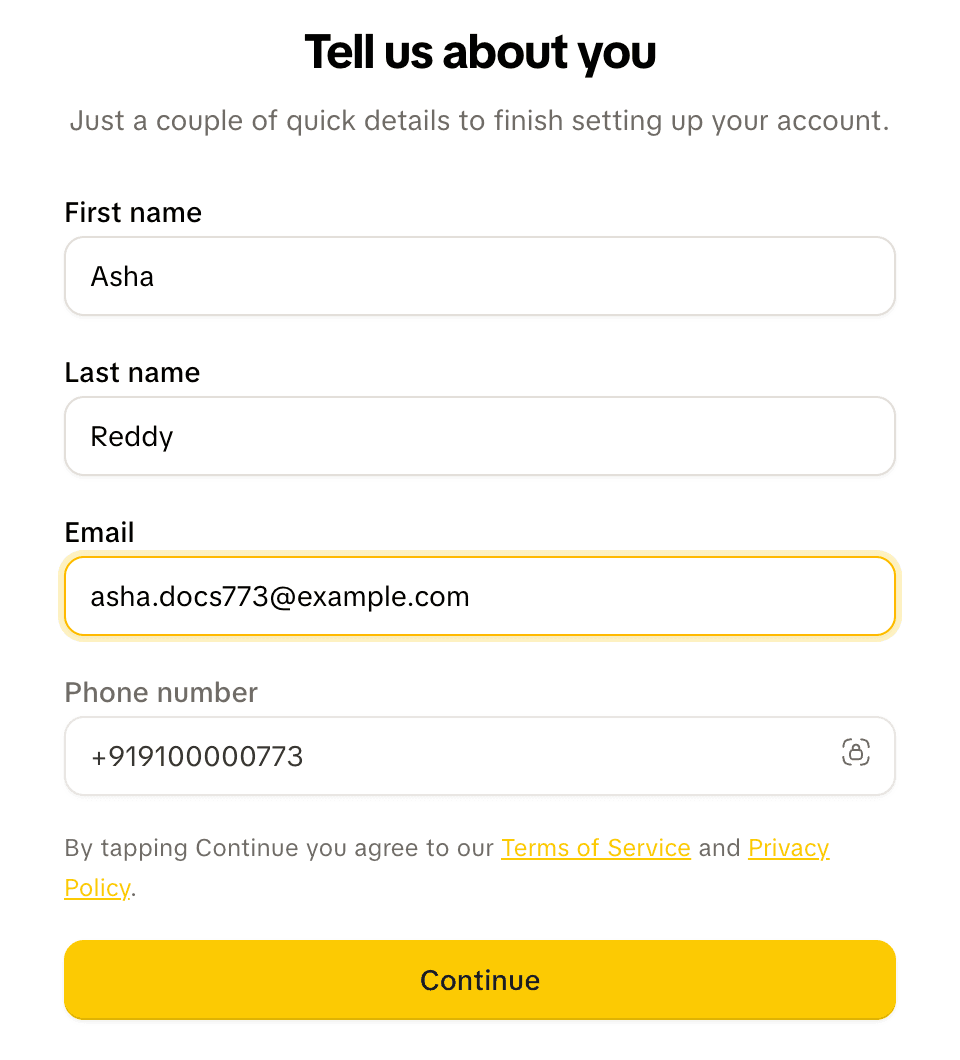
- On "Tell us about you", type your First name and Last name (up to 50 characters each). Then type the other contact you didn't sign up with: your Email if you signed up with your phone, or your Phone number if you signed up with email. The one you signed up with is shown underneath with a lock; you can't change it here.
- Click Continue. Loopearn sends a code to the new email or phone straight away.
- Type that 6-digit code. You'll see "Email added." or "Phone added." and move on to creating your business.
About codes
- A code is 6 digits and works for 5 minutes.
- You get 3 tries at each code. After 3 wrong tries that code stops working, even if you then type it correctly. Click Resend to get a new one.
- Under the boxes you'll see "Resend code in 30s" counting down. After 30 seconds it changes to "Didn't receive the code? Resend"; click Resend for a new code.
- You can ask for 5 codes to the same number or email in 10 minutes. After that you'll see "Too many codes for this phone number. Try again in N minutes."
- Typed the wrong number or email? Click "← Use a different number" (or email) on the code screen. It takes you back to the Log in screen, so click Create account again first.
If you already have an account, Loopearn says "You already have an account with …" and shows a Log in button. Logging in uses the same code steps, without "Tell us about you".
Each login lasts 30 days, and every day you use Loopearn the 30 days start again.
Joining someone else's business
If someone invited you to their team, you got an email with a link.
- Open the link. If you're not logged in, you land on the Log in screen.
- Log in, or click Create account if you're new and go through the steps above. Use the email address the invite was sent to.
- You come back to "Join [business] on Loopearn". Click Accept invitation. You'll see "Welcome to [business]!" and land on its dashboard.
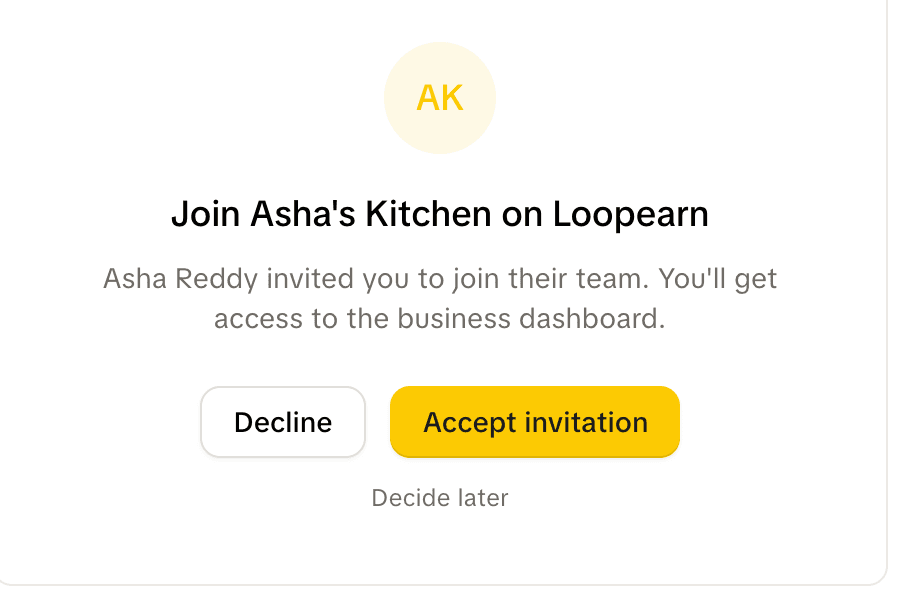
You can also click Decline, or Decide later to go to your dashboard and keep the invite. An invite works for 7 days. If it has run out you'll see "Invite expired"; ask the owner to send it again. If you're logged in with a different email from the one invited, you'll see "This invite is for [email]" and a Switch account button.
You don't create a business when you join one, so you can skip the rest of this page.
Show LoopyAI your business
After your account is set up you land on "Show LoopyAI your business."
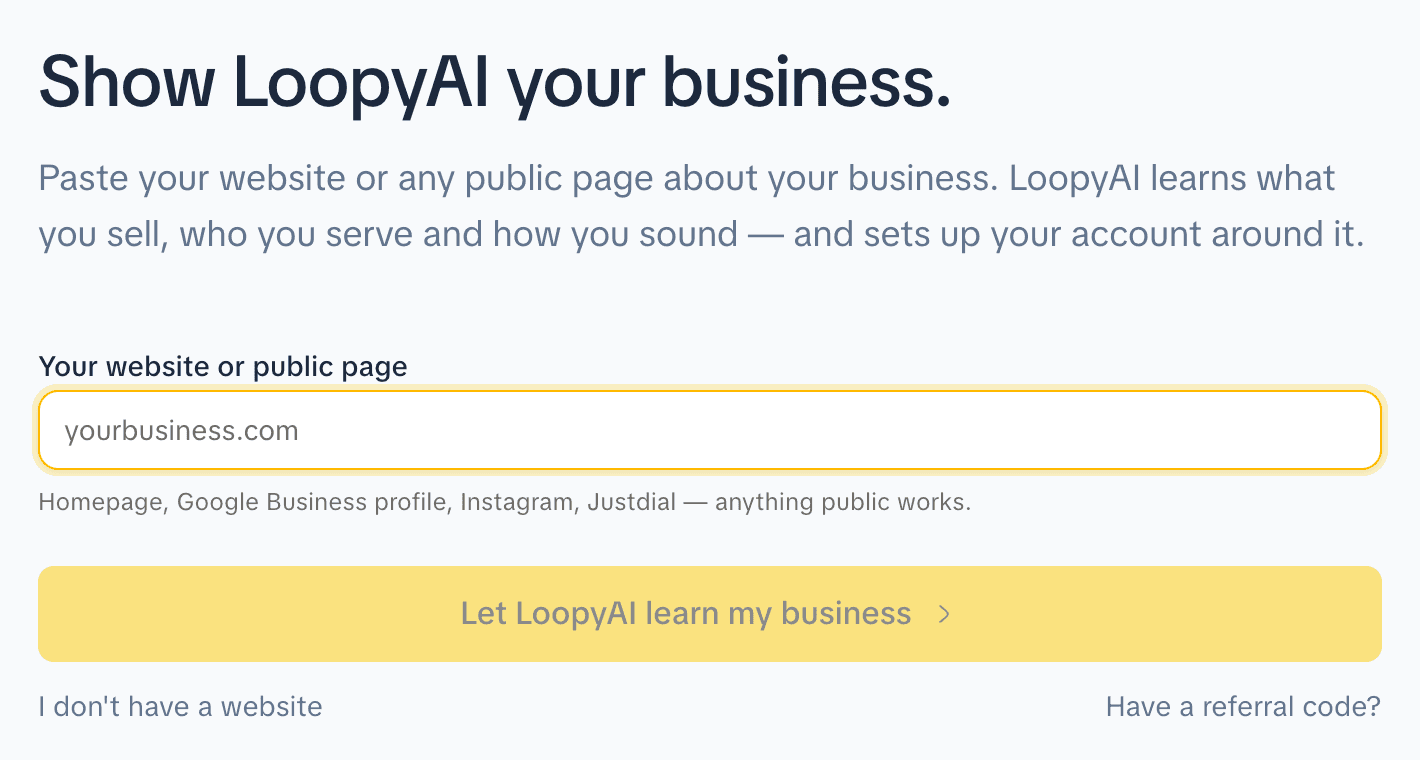
- In Your website or public page, paste your website or any public page about your business (a Google Business profile, Instagram or Justdial page works).
- Click Let LoopyAI learn my business. LoopyAI starts reading the page and you move straight on to the next screen while it reads.
No website? Click I don't have a website. Anything you typed in the box is ignored and you fill in your details yourself.
Referral code. If someone sent you a Loopearn link with their code, you'll see "Referred by [name]" here already. If you have a code but no link, click "Have a referral code?", type it (4 to 12 letters or digits) and click Apply. If the code isn't right you'll see "That referral code isn't valid", and you can't use your own code ("You can't use your own referral code").
Check your details
While LoopyAI reads your page you'll see "LoopyAI is learning your business…" and "Reading [your website]". This usually takes a few seconds. If it's slow, a link appears after 6 seconds: Taking a while? Fill it in yourself. Click it to start typing; LoopyAI still fills in anything you haven't typed when it finishes.
When it's done, the heading changes to "Check what LoopyAI learned." Every box LoopyAI filled in has an AI-FILLED tag. The tag goes away as soon as you change that box.
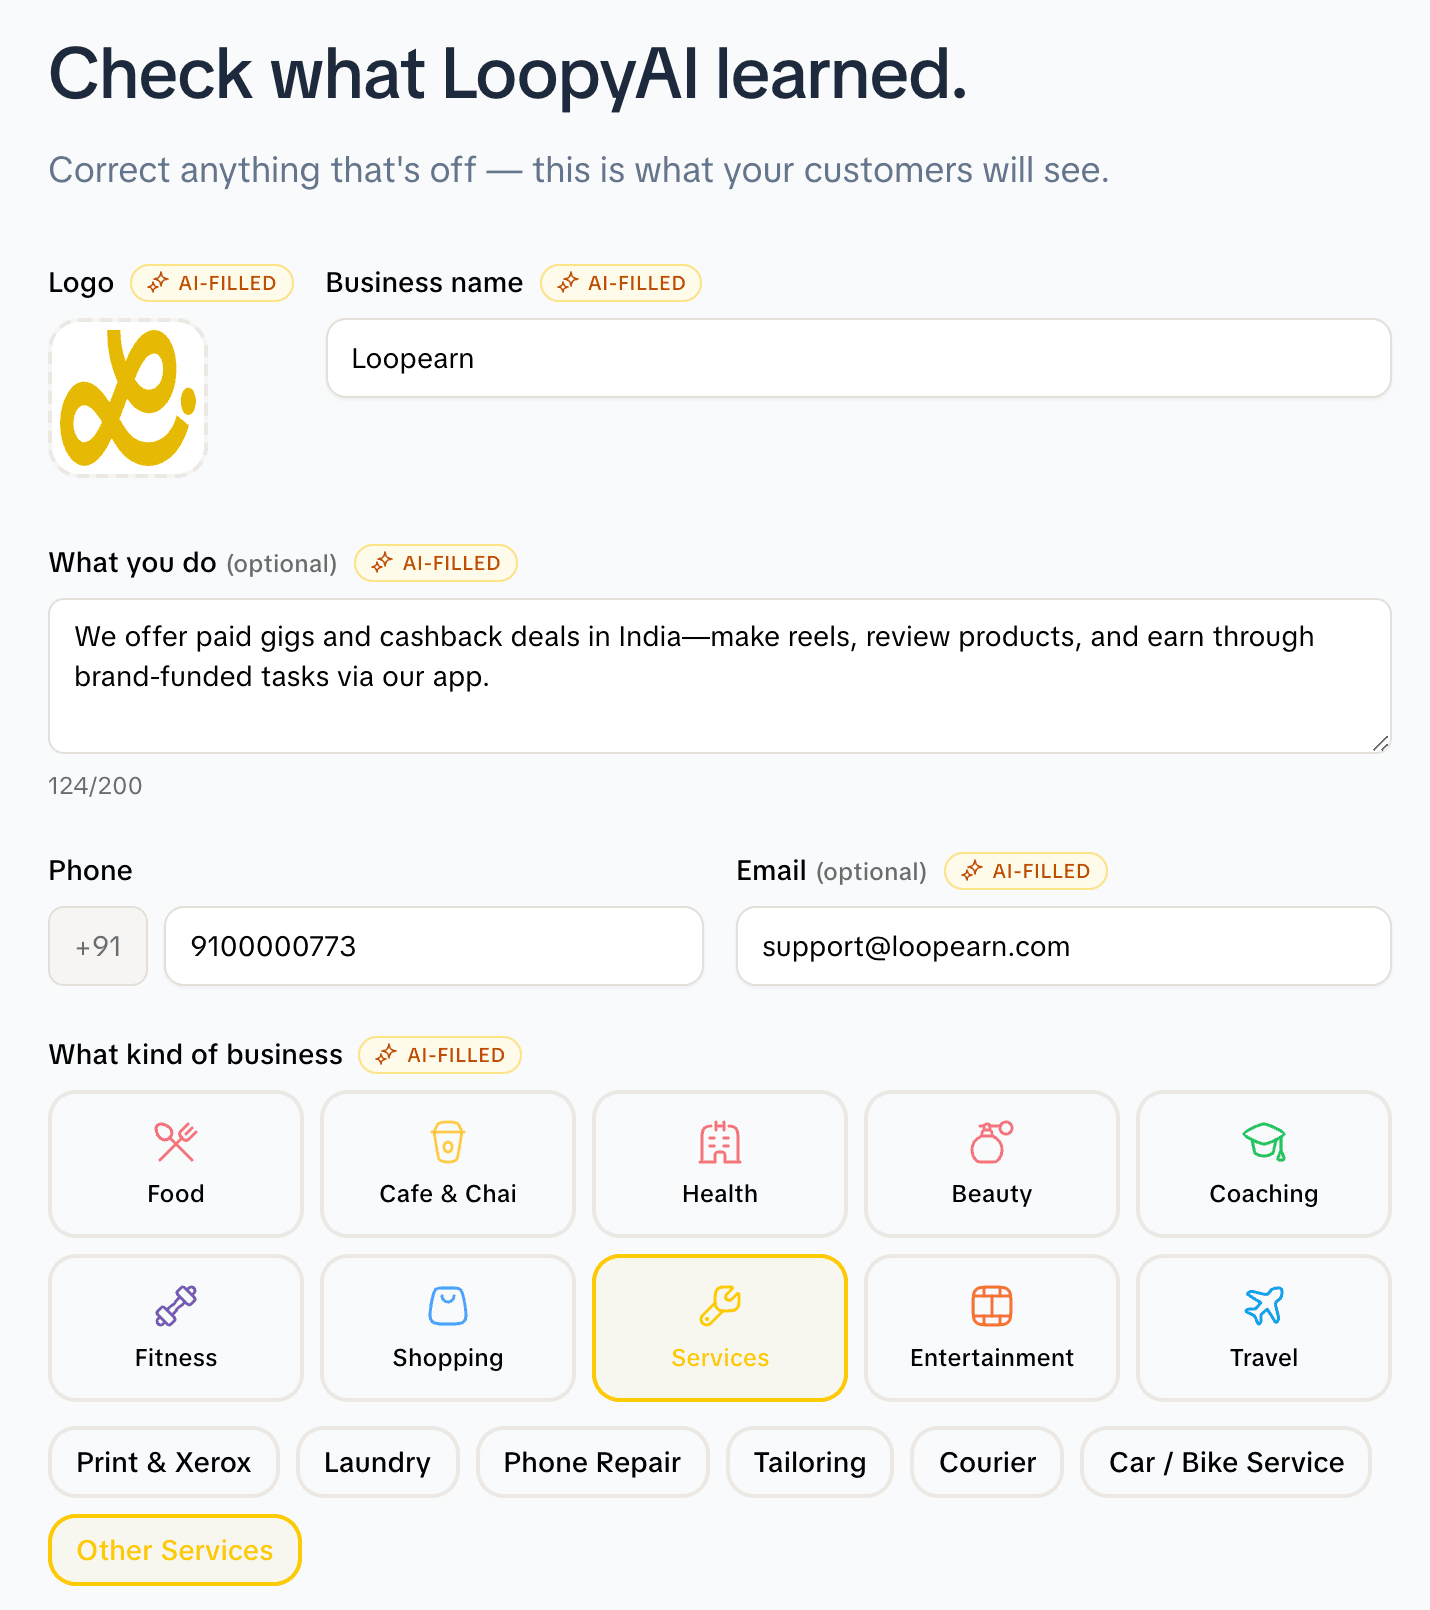
If LoopyAI couldn't read the page you'll see "LoopyAI couldn't read [your website]. Fill in the details yourself." Everything still works; just type your details in.
Check or fill in each box. This is what customers see:
| Box | Required? | Rules |
|---|---|---|
| Logo | Yes | Click the square to upload. PNG, JPG, WebP or GIF, up to 5 MB. |
| Business name | Yes | 2 to 100 characters. You can't use the name of another business you already own ("You already have a business with this name"). Another owner's business with the same name is fine. |
| What you do | No | Up to 200 characters. A short line about your business. |
| Phone | Yes | 10 digits after +91. Starts as the phone LoopyAI found on your page, or else the phone on your account. |
| No | Must look like an email address if you fill it in. | |
| What kind of business | Yes | Pick one of 10: Food, Cafe & Chai, Health, Beauty, Coaching, Fitness, Shopping, Services, Entertainment, Travel. Then pick any of the kinds that appear under it (for Food: Vegetarian, Biryani, Street Food and so on). Picking a different main kind clears them. |
| Cover Photo | No | A wide picture shown on the marketplace feed. PNG, JPG, WebP or GIF, up to 5 MB. Click Remove cover photo to take it off. |
Then click Create my business. The button stays greyed out while LoopyAI is still reading ("LoopyAI is still learning your business…") and until the required boxes are filled in. If something is still wrong when you click it, Loopearn tells you what, for example "Please enter a valid email address".
Back takes you to the website screen and keeps what you've typed.
You don't add your address here. That comes later, in Add your location.
Choose the category and cover photo carefully. Once your business is created you can change the logo, name, description, phone and email in Settings, but not the category or the cover photo.
While LoopyAI sets up
Your business is created as soon as you click Create my business. You then see "Setting up your business…" with a list of steps that tick off one by one and a timer.
LoopyAI works through steps like these:
- Reading your website
- Finding your logo and product photos
- Writing your brand profile
- Teaching LoopyAI your website
- Finding what works in your niche
- Drafting your first ideas
- Setting up LoopyAI's system information
- Filing your photos in Creator Studio
Steps that need a website are left out if you didn't give one.
When everything is done you see "[Your first name], your business is ready." with a card showing your logo, description and the brand colours LoopyAI picked. Click See what LoopyAI learned to check and edit it (it opens Settings › Brand), or Go to your dashboard.
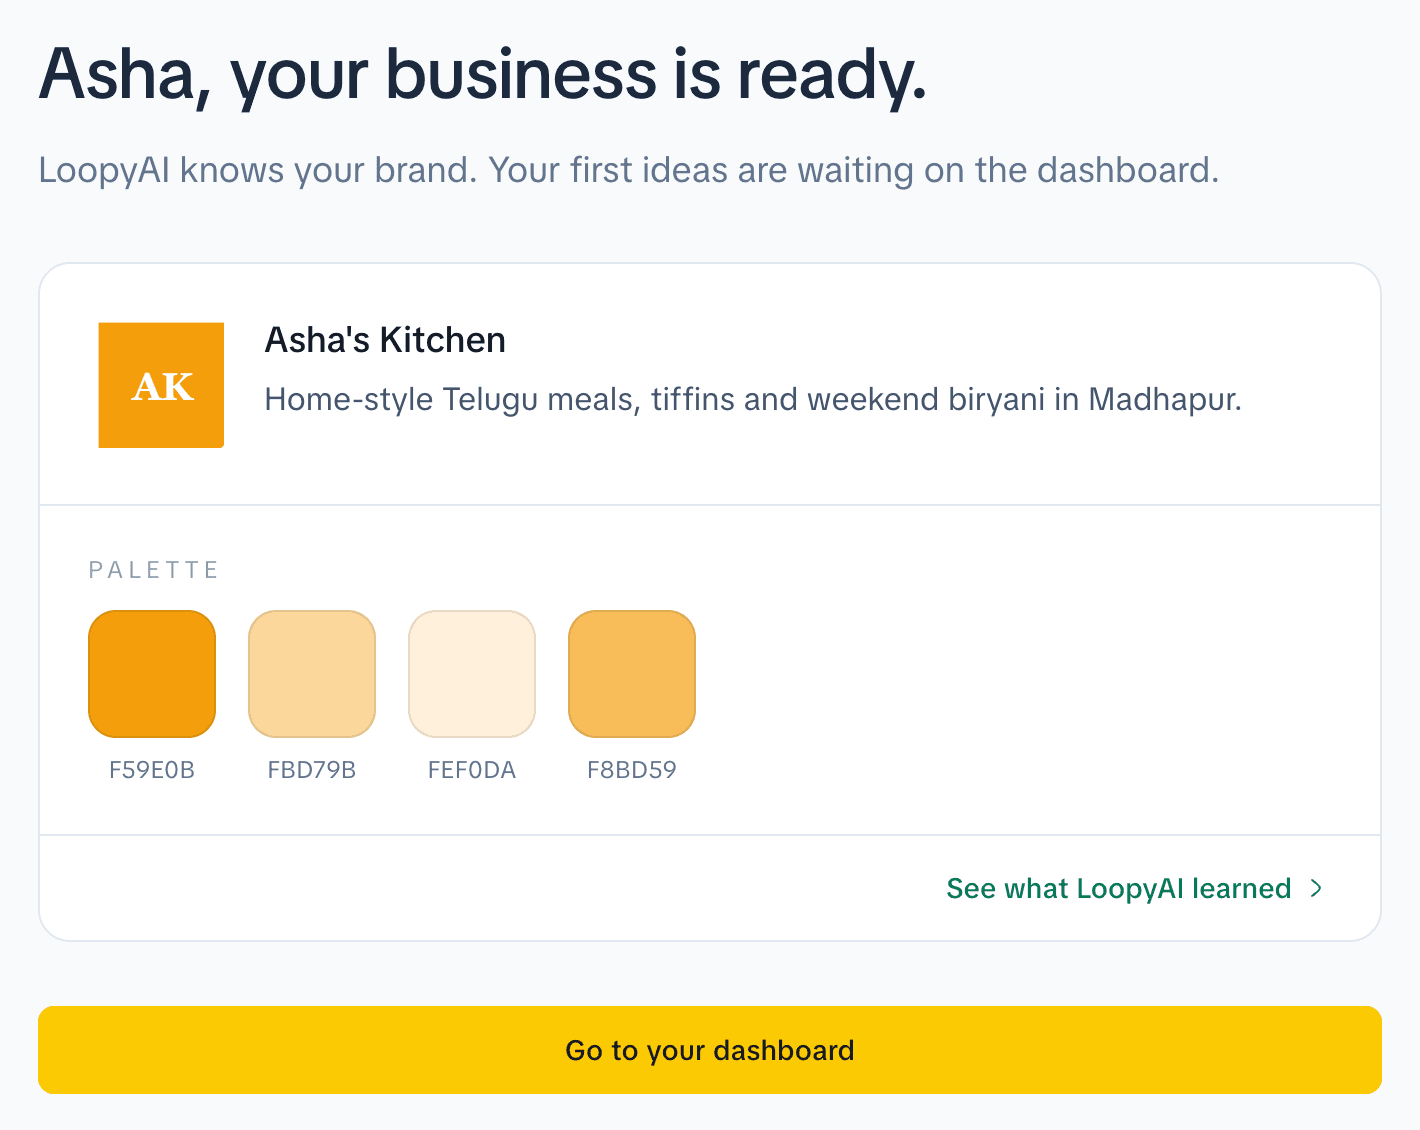
If it takes a long time. After 90 seconds (6 minutes while LoopyAI is reading a whole website) you'll see "This is taking longer than expected." and a Continue to your dashboard button. Your business already exists; anything still running finishes in the background.
If reading your website failed, the ready screen says "LoopyAI could not finish reading your website." Everything else is in place, and you can add your website to LoopyAI's knowledge later.
After setup, LoopyAI's first message in the chat on your dashboard sums up what it learned and suggests an idea to start with. That message is there for the first 7 days.
Your dashboard and the setup checklist
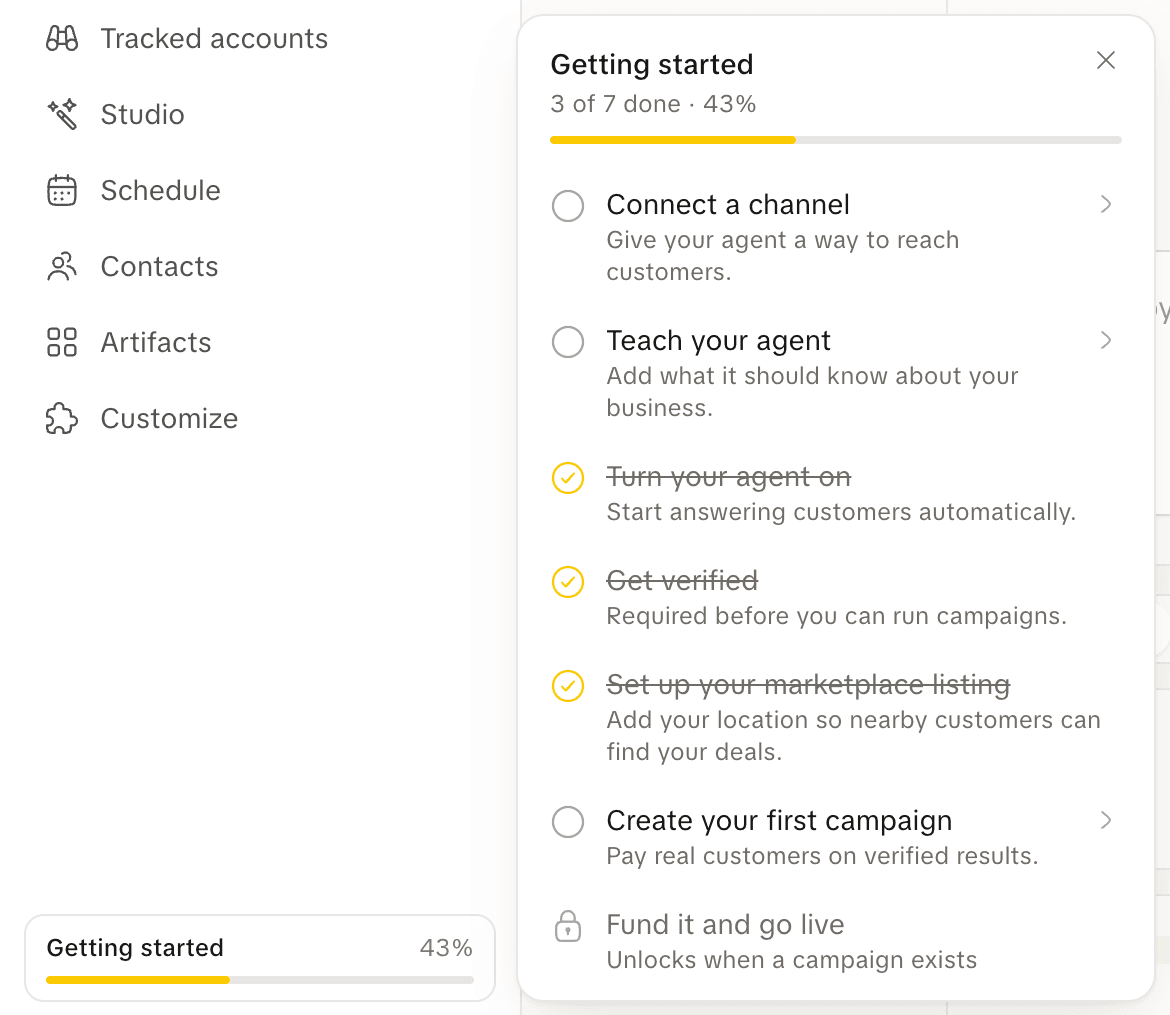
Your dashboard shows two copies of the same setup checklist:
- Your next step: Get ready to launch, a card on the right of Home. It shows "3 of 7" and so on, and a Start button on the first step you can do now. The card goes away when nothing is left that you can start.
- Getting started, at the bottom of the left sidebar, with a percentage. Click it to open the list. Each step you can do has an arrow; click it to go there. Click the × to hide the list. It's only hidden in this browser, and it disappears by itself when all 7 steps are done.
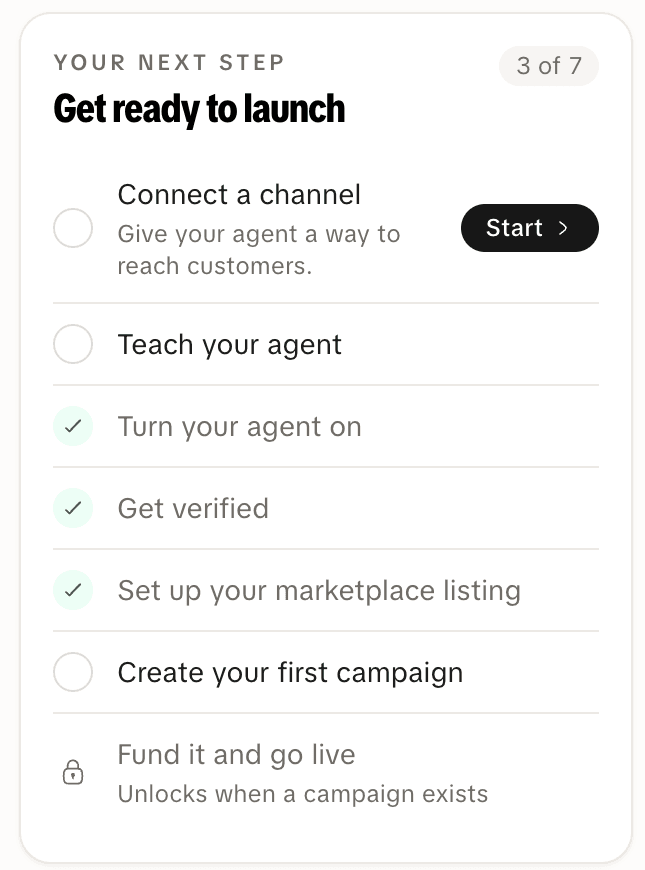
A step is ticked only when Loopearn can see it's done in your account. You can't tick one yourself. Locked steps show a padlock and what they're waiting for.
Click a step to see what ticks it:
- Ticked when
- WhatsApp, Instagram, Facebook Messenger or Telegram is connected.
- Takes you to
- Settings › Channels
- Read more
- Connect a channel
Two steps tick themselves: Turn your agent on from the start, and Teach your agent if you gave LoopyAI a website. A new business with a website usually starts on 2 of 7.
The order that works best:
- Get verified. Campaigns stay locked until you do, and it only takes a few minutes. You can add your address on the way.
- Add your location, if you skipped it while verifying.
- Connect a channel so LoopyAI can talk to your customers.
- Teach your agent anything your website doesn't say.
- Create your first campaign and fund it.
Add your location
Your address is where customers find you on the Loopearn map and redeem deals and cashback. Video campaigns don't need one.
There are three places to add it. They all use the same form, and an address added in any of them counts:
- The Business address screen while you get verified.
- Settings › Locations: open Settings at the bottom of the sidebar, then Locations. This works before you're verified.
- The Set up your marketplace listing step in the checklist. This page is behind the "Verify your business account" card until you're verified.
To add an address:
- Click Add Location (on the Business address screen the form is already open).
- In Search, start typing your shop, street or area and pick it from the list. This fills in the address and puts it on the map.
- Can't find it? Type it in yourself: Address line 1 (door number or building, required), Area / street, City (required) and PIN Code.
- Click Add Location. You'll see "Location added!". (On the verification screen, click Continue; it moves straight on.)
If Loopearn can't find a typed address on the map you'll see "We couldn't find this on the map. Check the area and city." An address Loopearn can't find on the map isn't saved. Pick it from the Search list, or fix the area or city and try again.
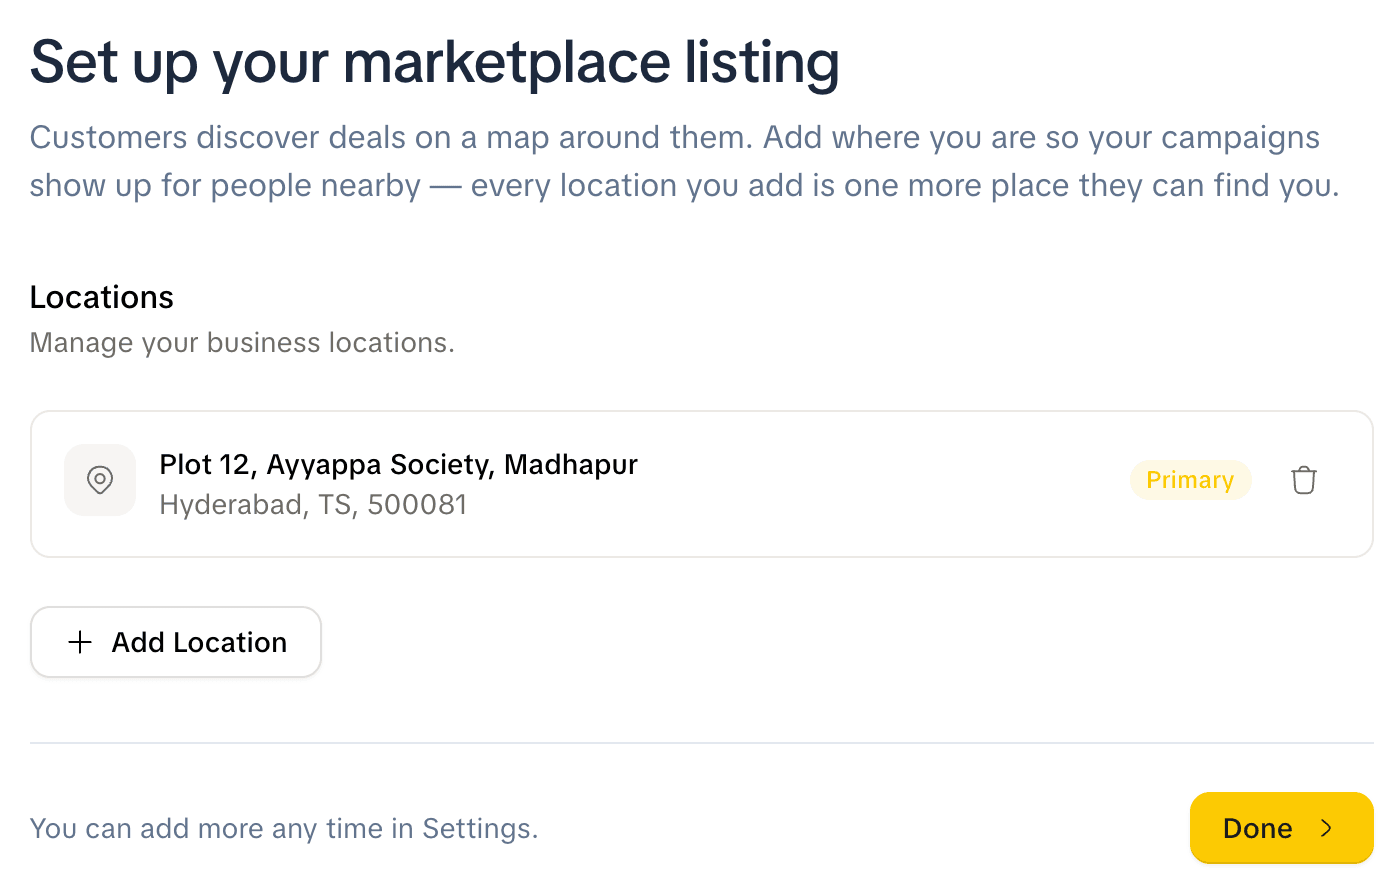
More than one branch. Add each address the same way. From the second one on, the form has Set as primary location. There's no limit on how many you add.
Changing an address. There's no edit button. Add the new address, then click the bin next to the old one and confirm. You can't remove your last address while a campaign is running near it ("A running campaign is shown near this address. End it before removing your last address.").
Invite your team
Your team can use the dashboard with you. Only the business owner can invite people. Your plan sets how many people can be on your team; see Plans.
- Open Settings at the bottom of the sidebar, then Team. (Or click Invite on the Team card on Home.)
- Click Invite Team Member.
- Type their Email and click Send invite. You'll see "Invite sent to [email]".
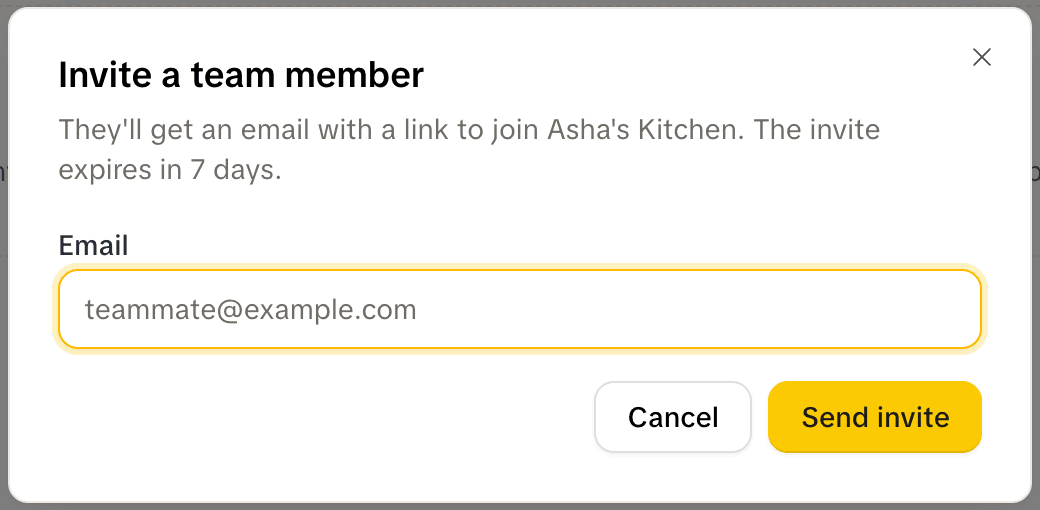
They get an email with a link to join. What they do next is in Joining someone else's business. Until they accept, they're listed under "Pending invitations" with the date it expires. From there you can Resend invite or Revoke invite.
What team members can do. Everything on the dashboard except payouts, verification, changing the refund bank account, API keys, billing and GST details, and deleting the business. Only the owner can also invite, resend and cancel invites, remove people ("Remove from team") and hand the business over ("Make owner"). A team member can leave with Leave team. The owner can't leave their own business; they'd have to hand it over first.
Invites only go to email addresses. Someone who signed up with their phone can still join: they need the invited email address on their account, which Loopearn asks everyone to add at sign-up.
Change things later
Most settings live in Settings, at the bottom of the left sidebar. It opens as a window with a menu on the left.
| To change | Go to |
|---|---|
| Logo, business name, description (up to 500 characters) | Settings › General › Profile, then Save Changes |
| Phone, email, website customers see | Settings › Contact (also on General) |
| Addresses | Settings › Locations |
| Brand colours, voice and the photos LoopyAI found | Settings › Brand. Anything you change there stays yours: LoopyAI won't overwrite it. |
| Team | Settings › Team |
| Your bank account for refunds, and the UPI IDs customers pay you on | Settings › Payments. See Get verified. |
| Your plan | Settings › Billing. See Plans. |
The category and cover photo you picked when creating the business can't be changed in Settings.
A second business. Click your business name at the top of the sidebar and choose Add Business. You go through Show LoopyAI your business and Check your details again. Each business has its own dashboard, team, verification and wallet; switch between them from the same menu. How many businesses you can own depends on your plan; see Plans.
Deleting a business. First end your running campaigns and take the money out of your wallet: Loopearn won't delete a business while money is in its wallet, held for a campaign or still on its way to someone. Then go to Settings › General › Danger zone, click Delete business account, type the business name and click Delete permanently. The business is removed straight away and its scheduled campaigns are cancelled; contacts, conversations and what LoopyAI knows are erased after 30 days.
Common problems
| What you see | What to do |
|---|---|
| "No account found for …" when logging in | You haven't signed up with that number or email. Click Create account, or try your other contact. |
| "You already have an account with …" | Click Log in instead. |
| The code doesn't work | Codes work for 5 minutes and 3 tries. Click Resend for a new one. |
| "Too many codes for this phone number. Try again in N minutes." | You asked for 5 codes in 10 minutes. Wait the time shown. |
| "This email is already on another account. Use a different one." | The second contact you gave belongs to another Loopearn account. Use a different one. |
| Your country code isn't in the list | Only +91 and +1 phone numbers work. Sign up with your email instead, though you'll still be asked for a +91 or +1 phone. |
| "LoopyAI couldn't read [website]" | Fill in the details yourself. You can try another public page, like your Instagram or Google Business profile, by clicking Back. |
| Create my business stays greyed out | Check you have a logo, a name of 2+ characters that isn't one of your other businesses, a 10-digit phone and a category picked, and that LoopyAI has finished reading. |
| "You already have a business with this name" | Pick a different name for this business. |
| "That referral code isn't valid" | Check the code with whoever gave it to you, or carry on without one. |
| Setting up seems stuck | Wait for Continue to your dashboard (after 90 seconds, or 6 minutes with a website). Your business is already created. |
| Clicking "Set up your marketplace listing" shows "Verify your business account" | Get verified first, or add your address in Settings › Locations. |
| "We couldn't find this on the map. Check the area and city." | Pick your address from the Search list, or correct the area and city. |
| "An invite for this email is already pending. Use resend instead." | Click resend next to that invite under Pending invitations. |
| "This invite was sent to … Sign in with that email to accept it." | Log out and log in with the invited email, or ask the owner to invite the email you use. |
| "This invite has expired. Ask the owner to resend it." | Invites work for 7 days. Ask the owner to resend it. |
Need help? Email support@loopearn.com